Resin bound patios are becoming more popular in recent years because they are a durable, low maintenance and visually attractive alternative to traditional pavers. There are a variety of professional options to install, but increasing numbers of homeowners choose to complete resin bound patio projects themselves. It’s not just an inexpensive way to add some style to your patio, but also adds a more personalized appearance.
The process of creating your own resin bound patio might appear to be a daunting job but with the right equipment along with the right materials and assistance, it can be a fun and rewarding project. Here are some suggestions and tips to help you make a stunning resin bound patio all on your own.
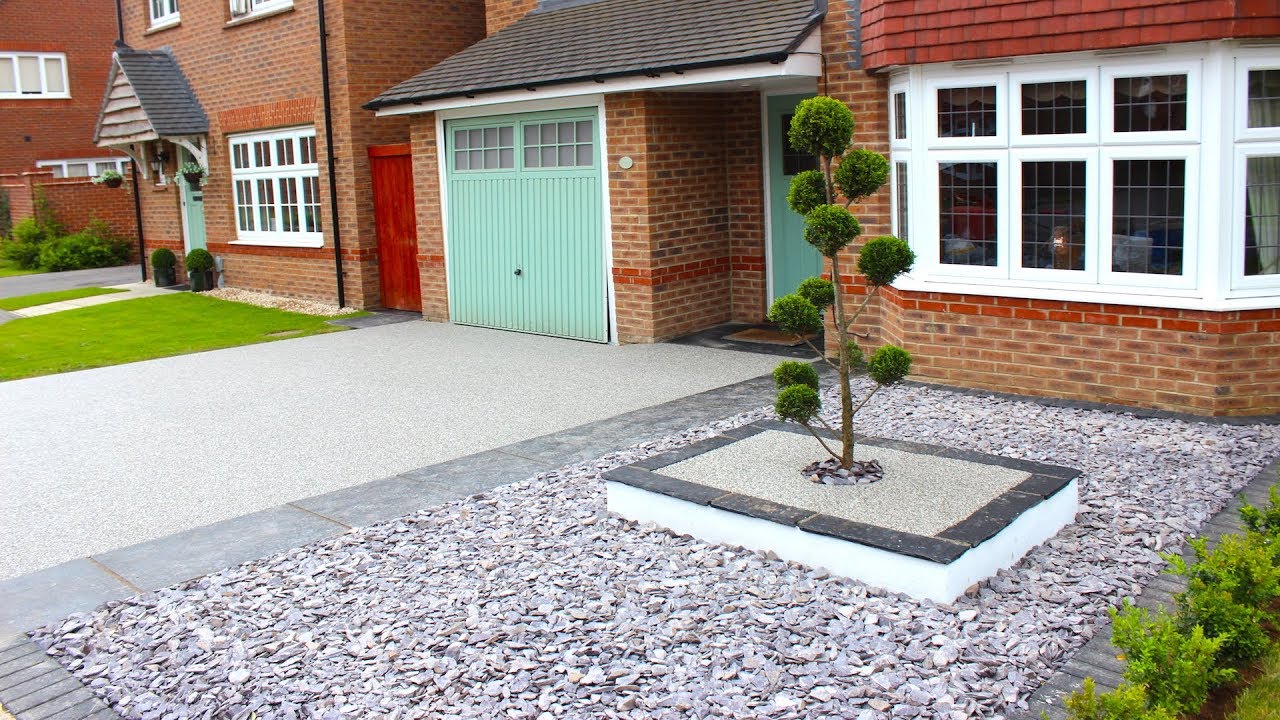
It is essential to understand what a resin-bound patio is. It is a mixture of natural aggregates like granite, marble, or stone together with a transparent resin binder. The mixture is troweled onto the surface and gives a non-slip surface.
It is possible to install a resin-bound patio over concrete, asphalt or even brick pavers. The surface should be free of any debris and in good condition.
It is crucial to assess the drainage requirements of the region prior to starting any work on the surface. The surface must be sloped enough to allow water to drain off and move out. This is crucial for regions that experience heavy rainfall. It is possible to build drainage channels or soakaways in order to ease drainage.
When the drainage requirements are assessed, it is time to prepare the surface to be able to use the resin bound patio. It is crucial to scrub the patio’s surface and eliminate any loose debris or weeds. It is also crucial to fix any cracks or damage to the surface since this will impact the final look of the patio.
After that, you’ll have to lay down a subbase. This is usually composed of crushed stone and gravel. The layer must be compacted, so that it is solid and even. The sub-base should be at a minimum of 100mm in thickness to provide a stable foundation for the resin bound mix.
The resin-bound material is blended after the subbase layer has been incorporated and then compacted. With a mixer combine the natural aggregates as well as the clear resin binder. Follow the guidelines of the manufacturer to ensure that correct consistency is achieved.
The mixture needs to be rolled on the floor with a thickness of between 15 and 18mm. It is essential to work quickly when applying the mixture since it will start to set within 30-40 mins. A trowel made from steel is used to ensure that the surface is smooth and level.
It is important that you let the mixture cure for a period of 24 to 48 hours following the time it was applied. This ensures that the mix is completely set and solid.
The resin bound patio needs to be cleaned, and maintained on a regular basis to ensure it maintains its aesthetics and functions. This includes regular sweeping to get rid of any debris as well as occasional power washing to wash away any marks or stains.
It has never been simpler to enhance the outdoor area of your home more than resin-bound gravel kits. These kits are an easy and fast solution to give your driveway, garden, or patio a fresh and appealing new appearance. They are not only aesthetically pleasing but also provide durable, low-maintenance surface that is perfect for busy homeowners. Resin bound gravel can be personalized to suit the style of your home. It comes in many colours and finishes. It’s easy to install, and it’s an excellent way to upgrade the exterior of your house. Get rid of boring areas for your outdoor space and welcome beautiful, functional areas with resin-bound gravel kits.
You can increase the value of your outdoor area with your own resin bound projects. The patio’s surface needs to be constructed and the drainage needs being assessed. With the right equipment, materials, and a bit of patience, a stunning resin bound patio is possible.
For more information, click Resin Bound Patio Diy